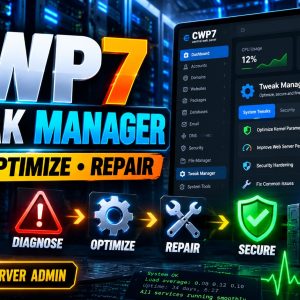

What are the steps involved in configuring the Apache Web Servidor using CWP7?
How do I configure and manage the Apache Web Servidor en CWP7?
The Apache Web Servidor is a powerful and widely-used web servidor software that can be configured and managed in the CWP7 control panel. In this article, we will provide you with step-by-step details on how to configure and manage the Apache Web Servidor en CWP7, so you can optimize your website’s performance and ensure a smooth alojamiento experience.
Step 1: Accessing the CWP7 Panel de control
In order to configure and manage the Apache Web Servidor, you will first need to access the CWP7 control panel. To do this, follow these steps:
- Open your web browser and enter the URL www.freespirits.gr or www.fspirits.com.
- Click on the login button located in the top right corner of the homepage.
- Enter your username and password to log in to the CWP7 control panel.
Step 2: Configuring the Apache Web Servidor
Once you have accessed the CWP7 control panel, you can proceed with configuring the Apache Web Servidor. Here are the steps you need to follow:
- Click on the “WebServer Settings” option in the sidebar menu.
- In the Apache Settings section, you will find various options to customize the servidor configuration. You can modify parameters such as the maximum number of connections, log files location, and more.
- Make the necessary changes to the settings according to your requirements.
- After making the desired changes, click on the ”Save Changes” button to apply the new configuration.
Step 3: Managing the Apache Web Servidor
Besides configuring the Apache Web Servidor, you can also manage it efficiently within the CWP7 control panel. Here are a few management tasks you can perform:
- Restarting the Apache Servidor: Click on the “Restart HTTPD” button located in the WebServer Settings section to restart the Apache Web Servidor.
- Viewing Apache Servidor Status: In the WebServer Settings section, you can also find the ”Servidor Status” option. Clicking on it will display real-time information about the Apache Servidor’s performance, active connections, and more.
- Creating Virtual Hosts: To create separate websites on your servidor, you can utilize the Virtual Hosts feature. Click on the “WebServer Settings” menu, then select ”Apache VHost Manager,” and follow the on-screen instructions to create a new virtual host.
- Managing SSL Certificates: If you want to secure your website with an SSL certificate, click on the “Free SSL Certs” option in the sidebar menu. From there, you can generate, install, and manage SSL certificates for your domains.
By following these steps, you will be able to configure and manage the Apache Web Servidor in CWP7 with ease. If you encounter any issues or need further assistance, feel free to reach out to us at Free Spirits. We are committed to providing fast, stable, and reliable alojamiento basado en el CWP7 project.
At Free Spirits, we provide fast, stable and reliable alojamiento basado en el CWP7 project. For more information, visit our main websites: www.freespirits.gr and www.fspirits.com.